TechKnowTalkies

Search This Blog

Sunday, June 23, 2019

How Under-Display Camera or ‘Notch-Less’ Display Works | 2021

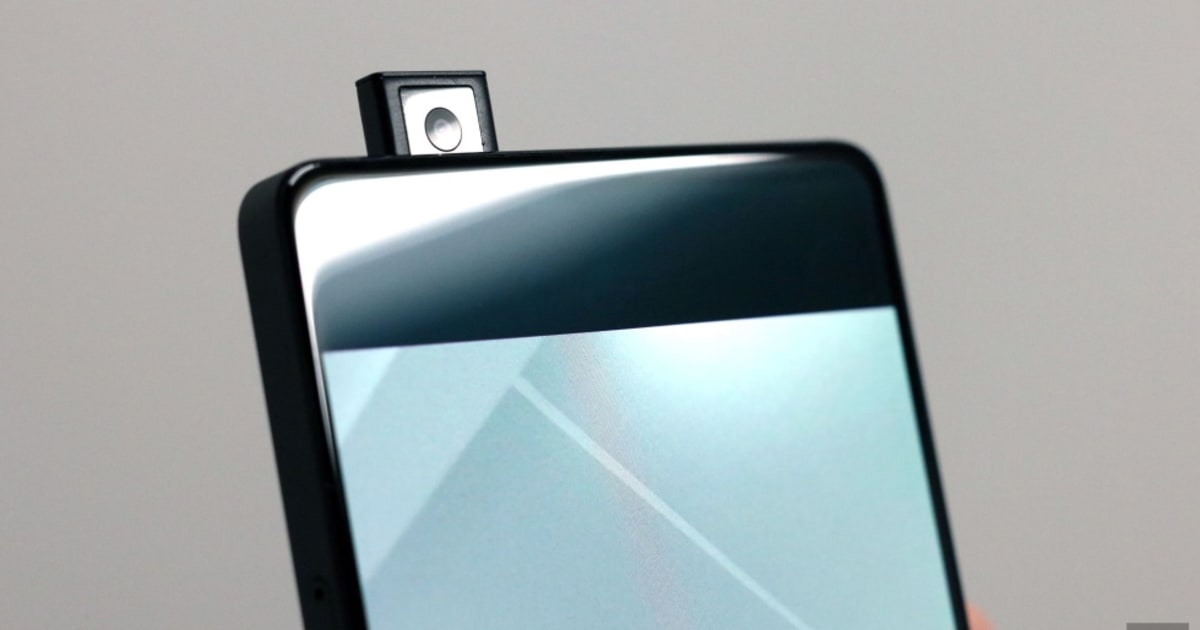
How many of us have been irritated by the notch on the top of the screen? How many of us have wanted a true full-screen bezel-less display? Well, Vivo achieved the same by using a motorized pop-up camera. But that limits the sensor size of the  front camera, which in  turn compromises the quality of the photos.
phone : illustration
Xiaomi has unveiled its Under-Display Camera Technology to provide a Full-Screen Display coexisting with a front camera. Currently, they are exploring the possibility of hiding the front camera under the display itself! When the selfie camera is activated, the display area over the camera becomes transparent instantly, allowing light to enter. Let us see how Xiaomi plans to achieve this.

They use a custom display with a small area of a transparent display, which is made using a special low-reflective glass with high transmittance. When not in camera mode, the transparent display acts like a regular screen, allowing you to use the entire screen as a display. The front camera is hidden under the transparent display, which itself doubles as a camera lens.

Under display camera technology
Since this display embedded camera combo allows more light to enter the lens, it produces clearer and crisper photos than the currently used pinhole camera. When the display is turned off, the camera disappears and results in a black surface that is entirely seamless. Moreover, this technology will also allow smartphone companies to use larger lenses for the front camera, which has been so far restrained by the size of the notch.
So very soon, we can bid goodbye to the notch that has been bothering us and get a true full-screen display.
Under display camera


See below the official Tweet from Xiaomi.

image source: google.com

Saturday, June 22, 2019

PUBG LITE India Pre-registration Event | 2019

This Article Contains: 
  • PUBG Lite for PC is going to be released in Asian Countries, including India
  • Requirements of PC have been discussed.
  • How to pre-register and get rewarded: link is available at the end
  • To log in and transitioning game with existing credentials 
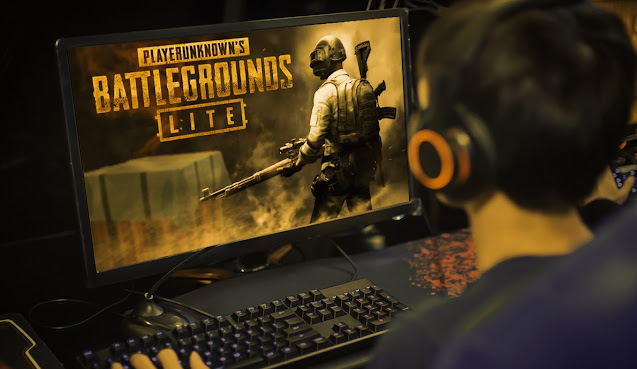
Toned down version of PUBG called PUBG LITE is going to get released in India very soon. After a successful launch of PUBG Lite in countries like Hong Kong, Taiwan, Brazil, and Bangladesh, the lightweight version of this game is confirmed to be released in India and many other Asian countries. The official PUBG India Facebook page released a picture including a silhouette of the Taj Mahal with the Words ‘PUBG LITE COMING SOON’.

Pubg lite Poster

Targeting the largest market for PUBG for the battle royale game, it is revealed in the news that early birds with pre-registration will get a free gift. Though the official date for releasing the game is not unveiled, the last date of the pre-registration to the PUBG LITE version is 3rd July.

PUBG in the mobile gaming sector managed to make a great deal of success in the Asian country. Cheap data rates and reasonable mobile specs PUBG mobile makers dominated the Asian market in no time. PUBG for the PC version was yet to be launched because of its high-end requirements.

But finally, in SAARC countries pre-registration had already begun on June 20. Few keys not to be missed:
  1. During this registration players who are new have to create an account for free at the PUBG LITE website
  2. Other mobile users can log in to the website with their old mobile credentials
  3. Once the account is created, players link their Steam, Xbox, PS4 account by clicking ‘Participate in Event.’
  4. Players with pre-registration will be awarded Tiger M46 and the Cheetah Parachute
  5. There are conditional awards for the players also. If the pre-registration exceeds over 100K, players will be awarded with Black Scarf, Punk Glasses, and Bloody Combat Pants.
  6. The Gold PUBG scarf, Striped Long-sleeved Shirt and Red Sports Top will be made available as if the registration benchmark exceeds 200K registration
  7. The awards will be entertained via in-game codes, and players will be notified through registered email.

Pubg lite Pre-registration Event
Poster from Official Website

Before the actual game is rolled out, download link to the Beta version of the game will be sent to the registered players via their email.

For the time being PUBG LITE version is PC only game. Though a mobile version can be launched in India, confirmation has not been done yet. The lightweight version of PUBG do not need dedicated GPU (Graphics Processing Unit) to be available on the PC. The requirements of the Game is as below:
  • Core i3, 2.4 GHz processor
  • Minimum 4GB RAM, 4GB storage
  • Inbuilt Intel HD Graphics 4000 or AMD Radeon HD7870 or Nvidia GeForce GTX 660 is recommended

Pubg lite illustration
This photo is for illustration purposes only.

PUBG Lite will be free to play, unlike the fully-loaded PC version.

Please drop a query if there is any. 

PUBG LITE Trailer:

image source: google.com

Which USB File System to Select: NTFS, FAT, FAT32 and exFAT | 2021

This Article Contains: 
  • Different File Types of external storage: NTFS, FAT, FAT32, and exFAT.
  • Their properties and Maximum file size they can support.
  • How to Change File Type using Laptop/PC.
  • Fix to Transfer 4GB or more file Size in Pen/Thumb drive 
  • Fix to 'File is too large for the destination file system'
  • This procedure is applicable for all kinds of OS(Windows/MAC/Linux(Ubuntu))
With the advent of USBs transfer of files has become a lot easier and faster. Just stick the USB in the slot and copy the files. Voila! However, sometimes you must have faced an issue with an error: 'file is too large for the destination file system' while copying files of large size or transferring files from Windows to Linux or vice versa. Today we will discuss the reason and solution of these issues.

File Too Large

We must have seen the above image many times while transferring files. Even though the pen-drive capacity is higher than the file size, the file cannot be copied to the USB disk, and the above window appears. To solve the above problem, let us understand the different types of file systems.

There are four types of file systems: NTFS, FAT, FAT32, and exFAT.

Most USBs come in a FAT32 formatted file system. This file system is compatible with all types of operating systems i.e. windows, Linux and Mac. Hence, files can be copied from one type of OS to another. Now the limitation of the FAT32 system is that it can handle individual file size of only up to 4GB, i.e., if the size of one file is greater than 4 GB, you will not be able to copy it in the USB disk, and a window similar to the above will appear. Here’s where NTFS comes to our rescue.

NTFS supports individual file transfers of size higher than 4GB. Hence whenever you face a problem with copying files of larger size, just format the USB drive using the NTFS file system. This option is available while formatting the disk. Formatting the drive will delete all the data in it. Just select the NTFS option in the encircled drop-down menu in the image below:
Fat32

Now we can transfer file sizes of greater than 4GB. So far, so good. But this file system is recognized only by windows. You cannot transfer files cross-platform, unlike FAT32. What if we want to transfer a file larger than 4 GB in size from windows to mac? That’s where exFAT comes in. This file system is recognized by all platforms and can transfer file size greater than 4GB. In other words, it combines the advantages of FAT32 and the NTFS system.

Again there’s one problem. Windows has not provided any option to format the drive using the exFAT file system. Fortunately, this can be done by using the command prompt. Just open the command prompt in admin mode, i.e. ‘Run as administrator.
Type the following command:
format X: /FS:exFAT
where X is the name of your USB drive.
Now you will see this in the Command prompt:

Insert new disk for Drive X:
and press ENTER when ready....’ 

Check if disk/Pen Drive/Thumb Drive(the one you want to change the file type) is properly inserted and listed under 'Devices and drivers'. Now hit ENTER. That’s it. You will get to see the progress in percentage. Sit back and relax.

As it is changing the storage type, it might take time more or less than 15 minutes depending upon the size of the external disk and the processing time of your PC/Laptop.

Once the disk is formatted using the exFAT file system the below messages will be shown.

exFat


Your external disk/Pen Drive can be used to transfer bigger files (any size smaller than the space of the disk) in any Operating System.

If you are using Linux(Ubuntu), some problems might occur to support the exFAT format. Please click here to know additional steps to use an external disk in Linux(Ubuntu).

image source: Own PC

Run Command Prompt in Administrator Mode in All Windows OS | 2021

Command Prompt or cmd in short, is a command-line interpreter application (located as cmd.exe in c:/windows/system32 directory) available in most Windows operating systems. It is used to execute entered commands. Most of those commands automate tasks via Powershell scripts and/or batch script programming, perform advanced administrative functions, and troubleshoot or solve certain kinds of Windows issues.

Command Prompt is sometimes referred to as Windows Command Processor. Though simple functionalities can be done in cmd without having administrator privilege. While running scripts or troubleshooting, it is compulsory to run the command prompt in administrator mode. Here will discuss how to open and run the command prompt in administrator mode in 5 different easy ways in your windows.

Method 1: Run from the Search box

1.   Hit ‘windows key’ W and type in 'cmd'.
2. Under Best match, right-click on 'Command Prompt' and select 'Run as administrator.' (If you are not log in with an administrator account, you will be prompted to enter the administrator password. Proceed with that if necessary. )
Command Prompt Search

3. You may get the hint on the User Account Control asking, "Do you want to allow this app to make changes to your PC?". Nothing to worry about itClick on Yes, the Command Prompt will be opened with Admin privileged. 

  • Identify command prompt with or without Admin privilege. 
Opened CMD


Method 2: Run from Start Menu

1. Click on Windows 10 Start icon, or press "Windows" key on the keyboard.
2. Select Command Prompt and right-click on it, and then select "Run as administrator".

Run as Administrator


Method 3: Use "W + X" key

1. Right-click on the Windows Start button or press the "W + X" key on the keyboard.
2. Select "Command Prompt (Admin)" to run.

Windows + X


(On Windows 10 Update, the Command Prompt may not be there in the Start Menu bar, so get the other methods to open it.)

Method 4: Open from Task Manager

1. Open Task Manager. (Search "task manager" on the search box and click on Task Manager to open it.)
2. If you are the first time to open Task Manage on this system, it will be shown on the Fewer details mode. Click on More details to expand it.
3. Click on File, hold on the "Ctrl" key and click on "Run new Task", then the Command Prompt will be opened as administrator.

Task Manager


Method 5: Open from File Explorer

1. Press "Windows + R" or type in "run" on the search box to open Run.
2. Type in: %windir%\System32\, and press Enter to open the System32 folder.

Windows + R


3. Find the file name: cmd.exe, right-click on it and select "Run as administrator".


System32 Folder

Now you can use any methods to run the Admin command prompt and use it whenever required. 

Friday, June 21, 2019

No Premium! Play YouTube in the Background in Android/iPhone 2021

We all at some point or another got frustrated with YouTube App, because we can not minimize it when listening to favorite songs/music during multi-tasking in smartphone. You wonder how stupid this App is! Be it iPhone or Android, it does not allow user to run YouTube in the background.

This post will show how to play music/video in YouTube in the background by keeping in minimized state. Steps have been depicted step by step with pictures.

Now, without wasting much time let the secret of running YouTube in the background be revealed so that you enjoy your favorite song on YouTube.
  • Search youtube.com in any browser tab, preferably Mozilla Firefox but not limited to it (Chrome will also do).
                        
Step 1

  • Now click on the three dots on the top-right corner. This will pop-up window.
      
                             Step 2
  • The drop-down pop-up window will be like this.
     
                             Step 3

  • Select “Request Desktop Site”. You can see it will be opened like this.
      
                          Step 4

  • Now you can play any recommended video, or you can search any video in the search bar.
  • Once it starts playing, you can touch home button and minimize it. You can open any other Apps or even you can keep your display off by pressing power button. YouTube will be running in the background without being stopped.
  • For some browser(Google Chrome), video/music may pause once you minimize the Browser. But no worry, slide down quick settings bar, you can see the play button. Hit it. You are done.
Enjoy YouTube in the background. Stop cursing YouTube for being stupid. Be happy being smart. This trick is applicable for iPhone as well.

Featured Post

Join in Any 18+ WhatsApp Groups(10000+) in A Single Click | 2021

Welcome to this blog. Here, we love to share with you all the internet-related tips and tricks. If you plan to join different kinds of...