TechKnowTalkies

Search This Blog

Monday, June 21, 2021

Post-Trial, Get LinkedIn Premium free for 1 month | 2021

 LinkedIn in an employment oriented online service that allows you to network with professionals and search for job opportunities worldwide. While signing up is free of cost, it has an option of premium membership which provides some added benefits like increased visibility, InMail messaging, full profile visibility, and so on. You can visit their site to check out all the benefits of LinkedIn Premium. The premium subscription comes in four different options viz. Career, Business, Sales and Hiring. The career option is the cheapest one and comes at Rs.1400/month. However you can use premium free for one month as free trial. This offer is extended to everyone from LinkedIn.

Today we are going to show you how you can get LinkedIn premium free for one month apart from the free trial offered by them. Go through the following steps to enjoy extra one month of LinkedIn premium.

1. Go to Visual Studio Dev Essentials site. Click on 'Join or Access now' button.

2. Sign up on this page by creating a new account. Once you are signed up, login to their site. Their home page will be opened.

3. On the home page there is a 'Benefits' tab. Under this tab you can find a lot of free subscriptions. Among them there is an option 'LinkedIn Learning'. Click on activate. This will take you to LinkedIn site.

4. Login to LinkedIn page that opens up after clicking on activate. After logging in to their page, you will be directed to checkout page where you have to enter your credit card/ debit card details. Don't worry you won't be charged anything at this moment. They will start billing you once your free period is over. Click on 'Review Order' after entering your card details. Then click on 'Start you Free Trial'.

That's it! Now you can enjoy one month of premium subscription of LinkedIn. You may cancel the subscription after the free trial period ends to avoid any deduction of money from your account.

Do checkout our other posts:

Looking for DeepNude? First Read Here Before Downloading | 2021

Easiest way to Download YouTube Videos | 2021

Thursday, June 17, 2021

Windows 7/8/9/10 | Save Full Webpage/Long Screenshot in PDF/JPEG Format

Taking a screenshot has become a part of a daily requirement these days. 

If you are writing a mail to a customer-care, you may need to attach some reference documents to the mail, and the screenshot feature proves to be your savior.

If you are a content writer, then you surely need to take multiple screenshots on your computer every now and then.

Not only that, you may need to save some important notes/documents from any website, but the same is not available in PDF format, then this procedure will come in handy for sure.

                      Click Button

Though taking a long or expanded screenshot is much easier in the case of Android/iOS for PC or Windows, it is a little bit trickier.

Do not worry, we got you covered!

By the end of this article, you will learn how to save any webpage in PDF format.

So, let us show you step by step how to take the long/expanded screenshots on your PC or Desktop.

1. Go to https://goscreenshotting.com/ on any of your web browsers.

goscreenshotting.com

2. Add the extension to the browser.

add to chrome


3. Pin the extension onto your web browser

Pin the Extension

4. Now open any webpage and use any of these options to take a screenshot.

sceenshot sample

5. Once the screenshot is captured, it can be saved in PDF/PNJ/JPEG format as well.

save screenshot


Hope you liked this article. Stay tuned for more tips and tricks like this.

Must Read!

No Premium! Play YouTube in the Background in Android/iPhone 2021.


If you are stuck at any point please watch this tutorial.

Monday, June 14, 2021

Script -3 : Blogger Quiz Code script for Free | % Calculation | June 2021 | 100% Working

 If you are planning to make a quiz test on your blogger website, you have come to the right place. 

This post will give you a ready-made script that you just need to copy and paste into your blogger website.

You read it right! Just copy and paste!
No hidden script!
No modification is needed!
Compatible with Free Templates!
It is FREE !!


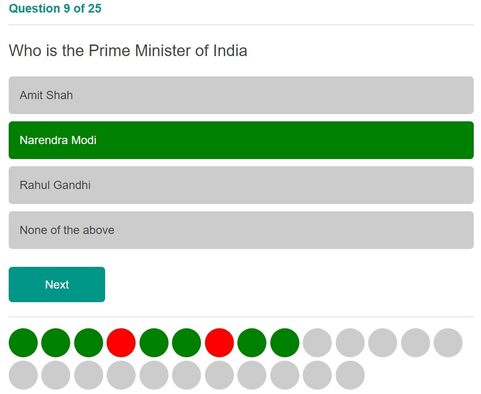
The quiz is too interactive and animated. It will calculate your quiz score as well.

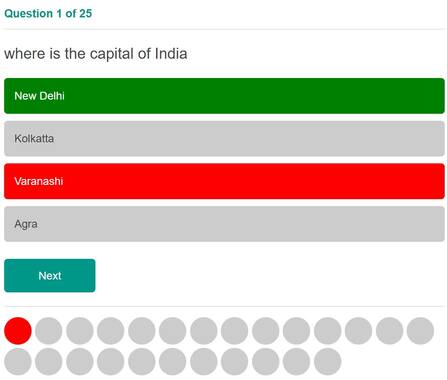
The quiz format would be like this.

For the Correct Answer:

quiz sample


For the Wrong Answer:


wrong answer


Quiz Score:


quiz score


Hope you liked this script! If you would like to get more scripts like this, please stay tuned to our website.

Download the code from here. 
download button

Check out a few other Quiz formats.
Script -1: Blogger Quiz Code script for Free | Show/Hide Feature | June 2021 | 100% Working

Saturday, June 12, 2021

Script -2 : Blogger Quiz Code script for Free | Show/Hide Feature | June 2021 | 100% Working

Are you looking for a blogger script to create a Quiz on your blog website?

You may have found many scripts on the internet but they are not compatible with your free themes? 

Do not worry about that. we got you covered.

No Coding Required! No Hidden Script! Just Copy Copy-Paste!

Pure Lightweight HTML code! No JAVA No PHP!

No Clickbait! Suitable for All Free and Premium Themes!

No need to modify a bit except for the quiz question and answers!

Advantages of this script : 
  1. Show/Hide feature in Quiz - blogger free script
  2. No coding skill required
  3. Compatible with all free(or premium) blogger themes available
  4. Script has no hidden tags or JAVA/JSON/PHP scripts 
  5. Just copy and paste the code
Without wasting much time, let us jump into business.

Step 1: Log in to your blogger.com domain and create a 'new post'
Step 2: Go to HTML view
Step 3: Copy the code given in the last of this post and paste the same in your blog post.
Step 4: Type your questions and answers in the respective places.

The quiz will be in this format:

1. What does the word RAM stand for?


... Answer is D)
RAM stands for "Random Access Memory"


2. What is called the Brain of the Computer?


... Answer is A)
CPU is the brain of the computer.


3. Who is president of India(2021)


... Answer is B)
Ramnath Konvid is the President of India(2021).


So on...
You can copy this code from here.


Friday, June 11, 2021

Copy the Code Button in Blogger | 100% Free Script | June 2021 | Working

This article will show you how to easily embed the 'Copy' button in your Blogspot website. You might write some article or code snippet in your blog, and you want the reader to copy some of that using a simple copy button without much effort.

Advantages of this script :
  1. No coding skill required
  2. Compatible with all free(or premium) blogger themes available
  3. Pure HTML code, the script has no hidden tags or JAVA/JSON scripts
  4. Just copy and paste the code in your blog post
The interesting fact about this blog post is, this post itself used this same script. 

So let us directly jump into business!

Step 1: Log into your blogger.com control panel, create a new post and go to HTML view.
Step2: Copy this code given at the end of this post. Now there are two ways you can copy it.
a) You can drag your mouse over the code section, right click and copy the code(no need to modify anything)
b)  Click on the 'Copy the Code' button(for this case you need to slightly modify the code before pasting it in your blog post)

For Step2: (a)

  1. Copy below code , starting from <textarea to <br />
  2. Whatever code or text you want readers to copy-paste that in place of {----This code/text will be inside copy box----}

<textarea cols="100" id="htmlText" readonly="" rows="20" style="background-color: #1b1b1b; color: white; height: auto; overflow: auto; resize: none; width: 100%;">
{----This code/text will be inside copy box----}
</textarea>
<button id="htmlBtn" onclick="copyhtml()" style="background-color: #4caf50; border: none; color: white; cursor: pointer; display: inline-block; font-size: 16px; margin: 4px 2px; padding: 10px 30px; text-align: center; text-decoration: none;">Copy the Code</button>
<script>
function copyhtml() {
const text = document.querySelector("#htmlText");
const btnText = document.querySelector("#htmlBtn");
text.select();
document.execCommand("copy");
btnText.textContent = "Code Copied Successfully";
setTimeout(function(){
btnText.textContent = "Copy the Code";
}, 5000);
}
</script>
<br /><br />

For Step2: (b)

  1. Click on the 'Copy the Code' button
  2. Once the code is copied into the clipboard, paste that to any HTML editor, say, Notepad ++ or blogger HTML view itself.
  3. Now find first <//textarea and replace that with <textarea that means just remove those two // symbols.
  4. Find second <//textarea and replace that with </textarea that means remove one / symbol
  5. Find <//button and replace that with <button that means just remove those two // symbols.
  6. Now find first <//script and replace that with <script that means just remove those two // symbols.
  7. Find second <//script and replace that with </script that means remove one / symbol
  8. Finally find <br //><br //> and replace that with <br /><br /> that means remove one / symbol from each angular bracket< >


You should follow only one method, i.e. either Step2: (a) or Step2: (b). Do not follow both the steps. 

Please comment if you are still facing any issue using this script on your blogger.com website, we will help you resolve that.

Featured Post

Join in Any 18+ WhatsApp Groups(10000+) in A Single Click | 2021

Welcome to this blog. Here, we love to share with you all the internet-related tips and tricks. If you plan to join different kinds of...